Integrate Consultmed with Gentu
To integrate Gentu Practice Management Software (PMS) with Consultmed, simply link your Gentu account during the sign-up process or at any time after your Consultmed account has been set up.
1. Integrate with Gentu: As a New User
1.1 Create a Consultmed Account
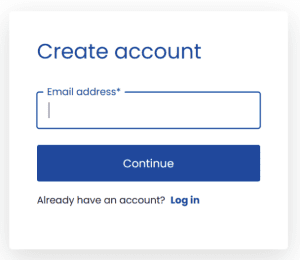
- Visit Consultmed (https://app.consultmed.co) to create a new account
- Enter your preferred email address (username) and password to create a new Consultmed account
Tool Tip: Each user is required to maintain a separate Consultmed account to uphold data privacy and security standards.
- Choose an account type (e.g. Specialist, Practice Manager) that matches your role within your health or care team
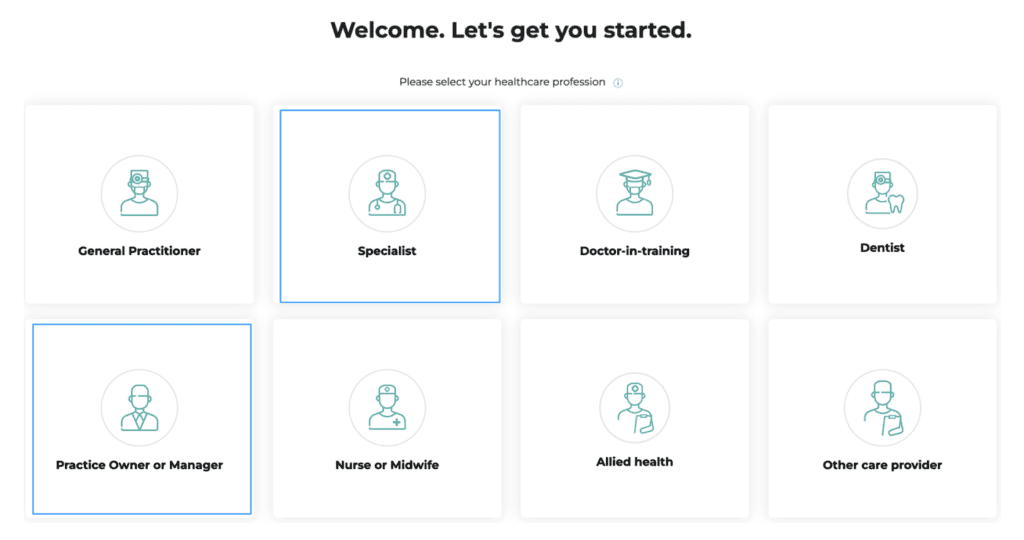
- Enter your professional details. Ensure your first and last name exactly match the details recorded in Gentu.
- Select your establishment type (e.g. Specialist Clinic).
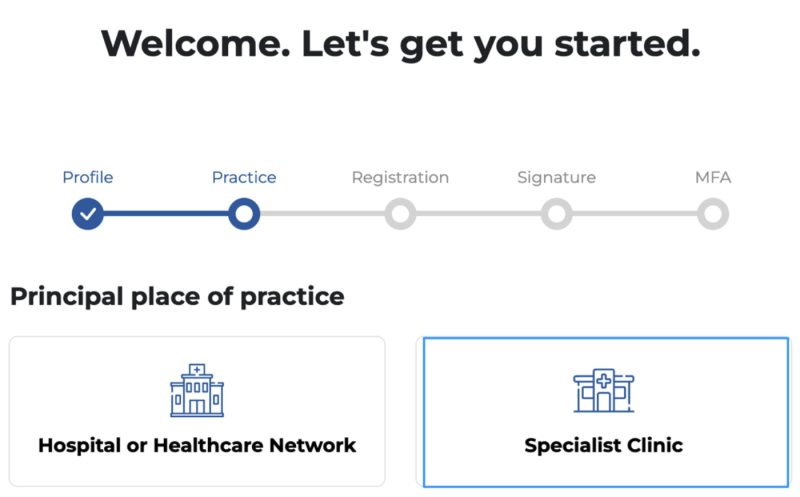
- Search for your establishment by name or address, or add a new establishment by selecting +Add Practice
- Enter your registration details. You also have the option to add a signature or profile image to your account
1.2 Connect Consultmed with Gentu
- Select Gentu
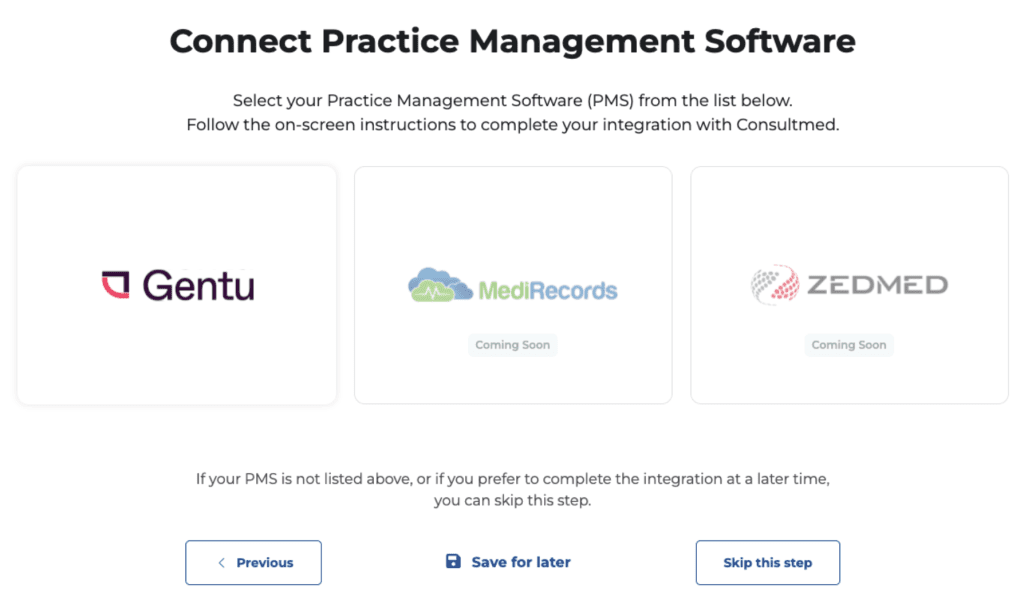
1.3 Add Consultmed to Gentu
- Open your Gentu Practice Management Software (PMS)
- From the left-hand panel, select Gentu Marketplace.
- Click on the Consultmed Icon
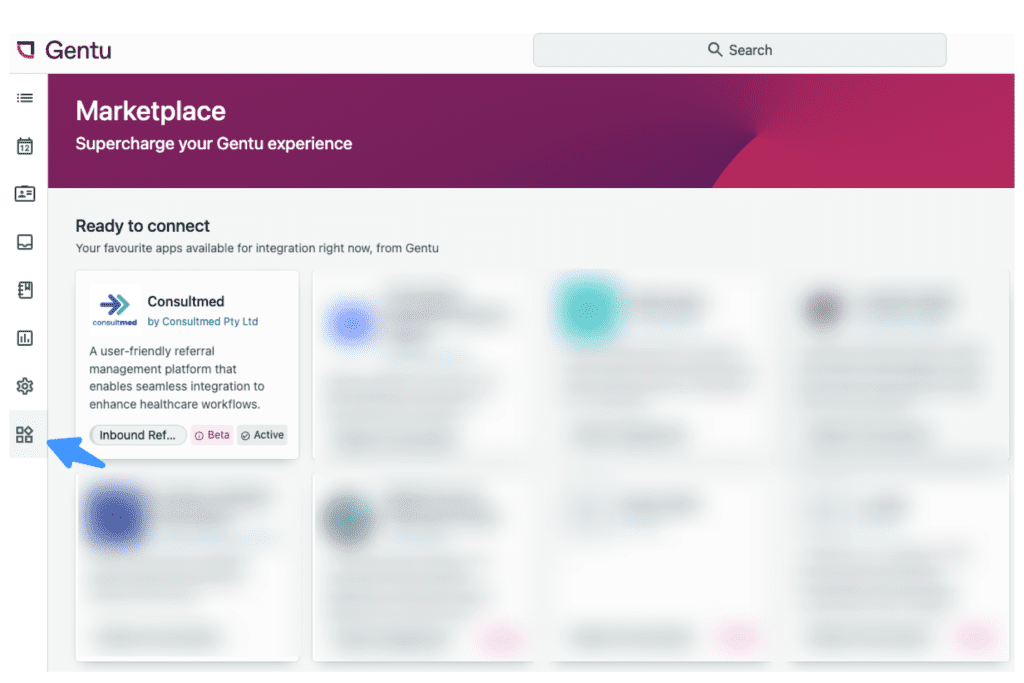
- In Step 1, review the Terms & Conditions, then click “I agree” followed by “Next”.
- Copy the Gentu Pairing Code displayed on the screen.
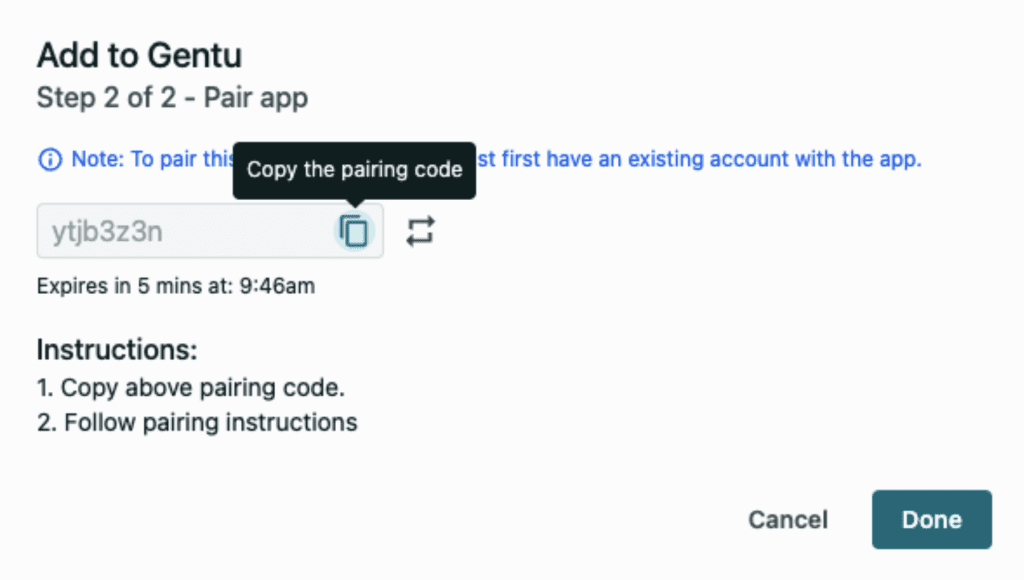
1.4 Pair Gentu with Consultmed
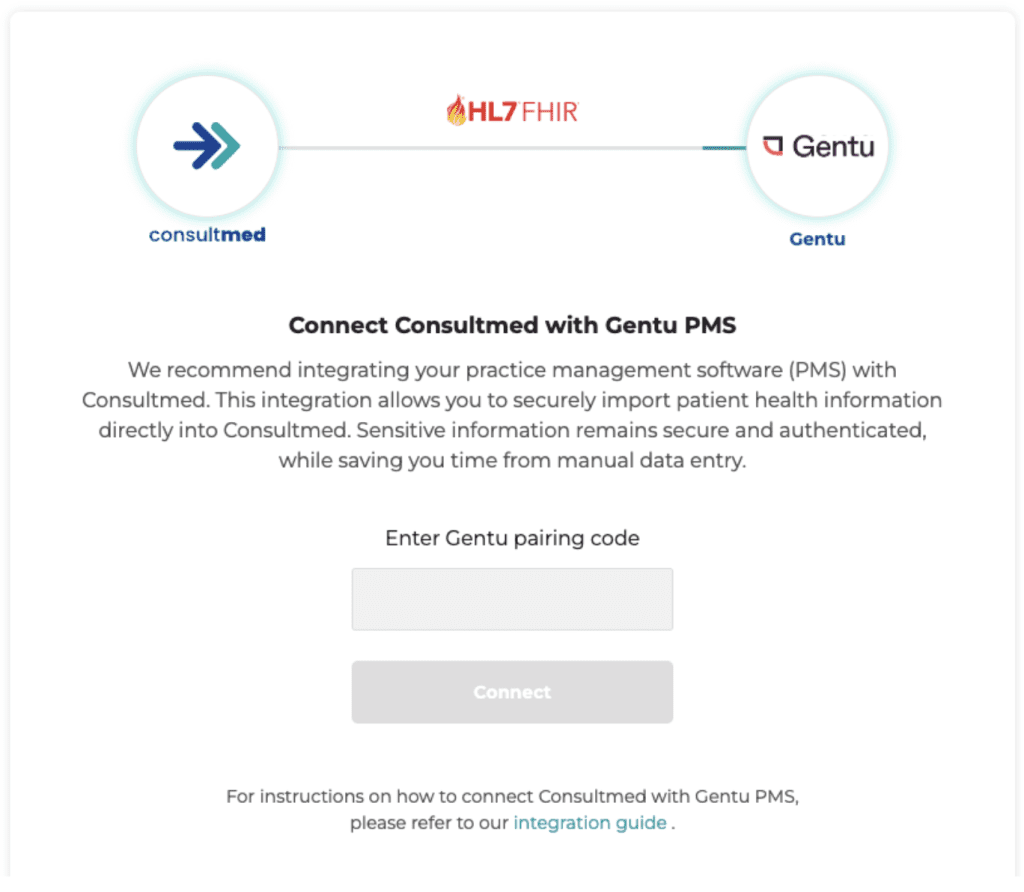
- Enter the Gentu Pairing Code
- Click Connect to complete the integration
1.5 Complete Registration
- Carefully review and agree to Consultmed’s Terms & Conditions
- Select Complete Registration to finalise your account set up
- Set up Multi-Factor Authentication (MFA) to ensure account privacy and security
Step One – Integrate Consultmed as an Existing User
Tool tip: The Consultmed x Gentu integration can only be configured by users with superuser access, such as Specialist users.
1.6 Log into your Consultmed Account
- Log into your Consultmed account using your nominated email address (username) and password
- Navigate to Settings (the cog wheel icon in the top right of the screen), and select Software Integrations
1.7 Connect Consultmed with Gentu
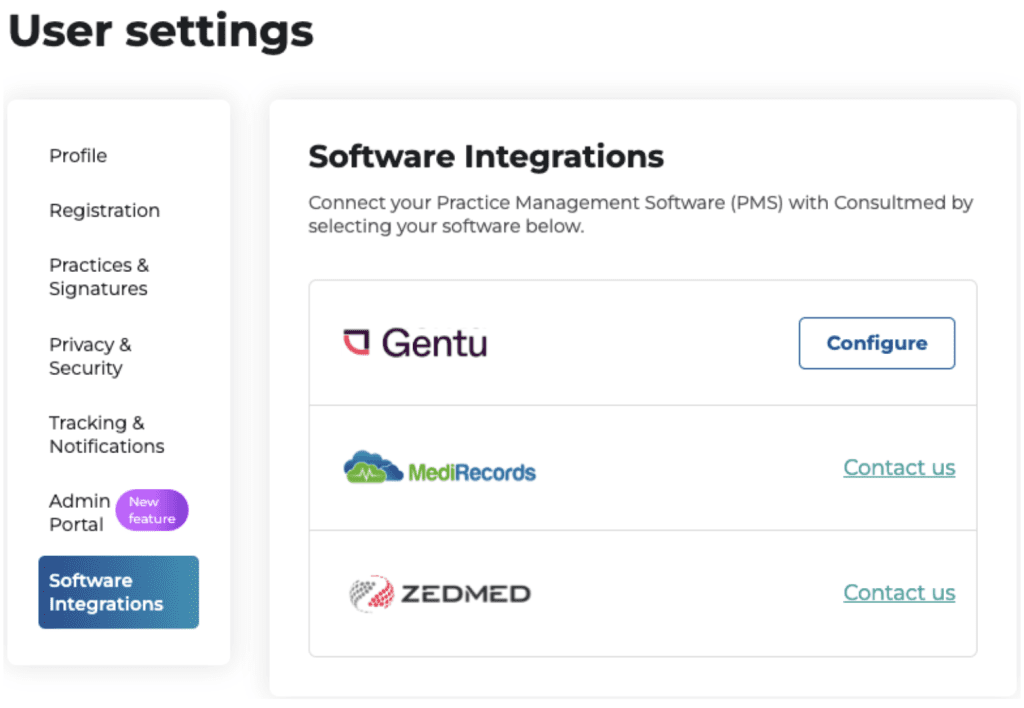
- Select Configure on the Gentu card
- You will be directed to Connect Consultmed with Gentu PMS page
- Select Configure on the Gentu card
- Enter the Gentu Pairing Code
- Click Connect to complete the integration
Successful integration
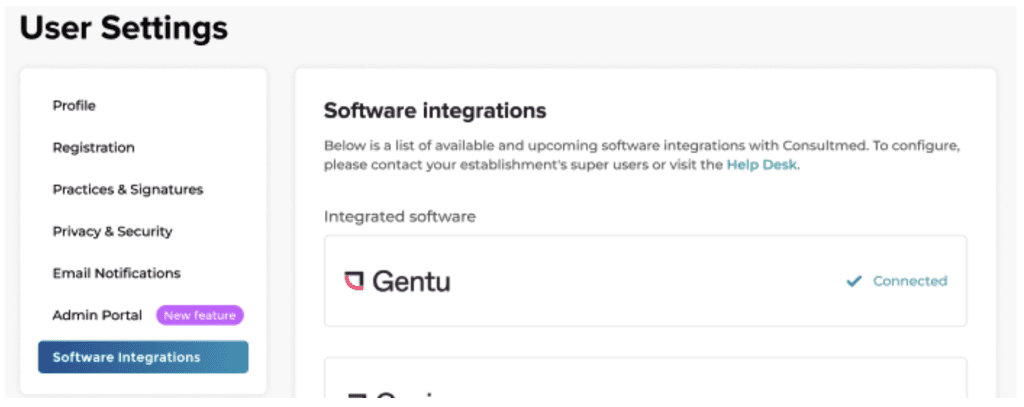
- Once complete, in User settings under Software Integrations, you will see your Gentu status showing Connected
Step Two – Create and Send Referrals
2.1 Create a new referral
- Log into Consultmed and Select +New Referral
- Filter by categories to refine your search and select a healthcare provider from the Directory of Services
2.2 Import Patient Data from Gentu
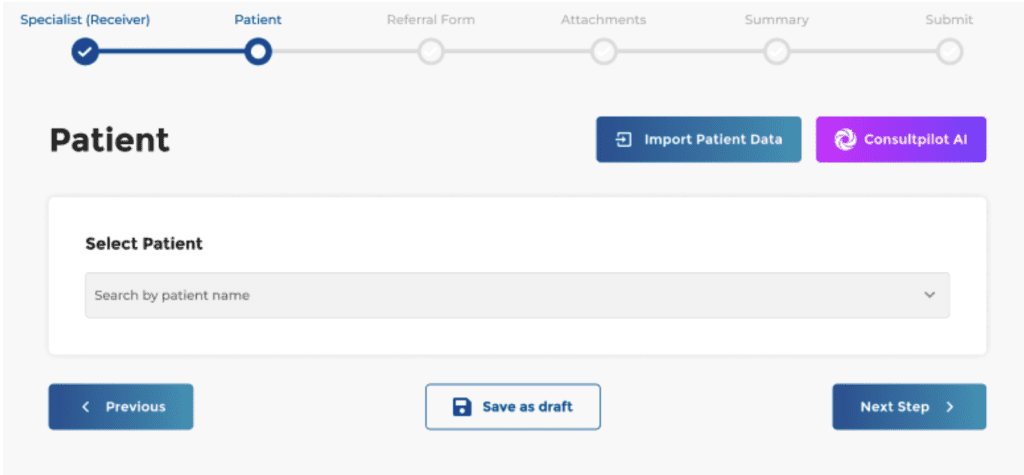
- Select Import Patient Data to initiate a search of patient details in your instance of Gentu
- There are two search options available
- Simple search
- Open the patient profile in your Gentu app
- Copy the URL from your web browser’s address bar
- Paste the URL into the field in Consultmed and click Search
- Simple search

- Advanced search
- Enter the Patient’s basic details (Last Name, First name, Date of Birth) and select Search
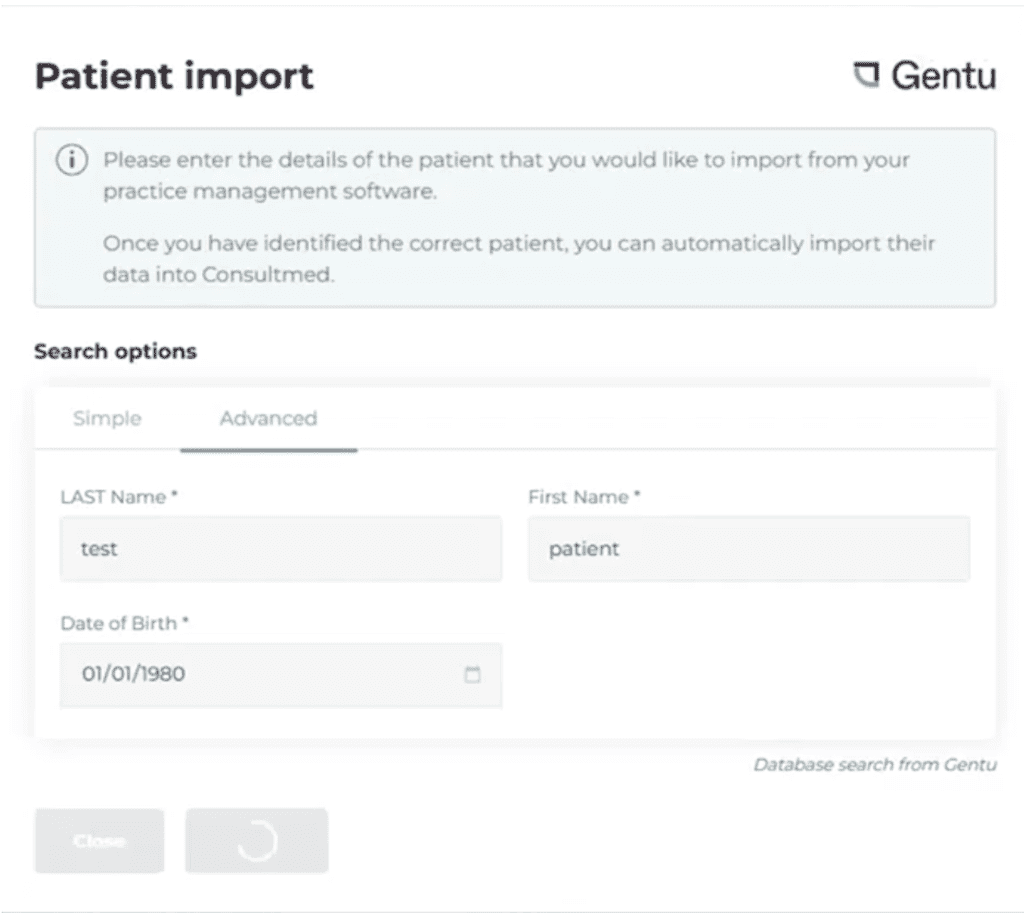
- Select the appropriate Patient match and click Import to automatically populate the referral form with the patient details stored in Gentu
- Remember to review and confirm the imported patient details
2.3 Correspondence Folder
- Once submitted in Consultmed, your referral will automatically be saved into the Correspondence Folder in Gentu
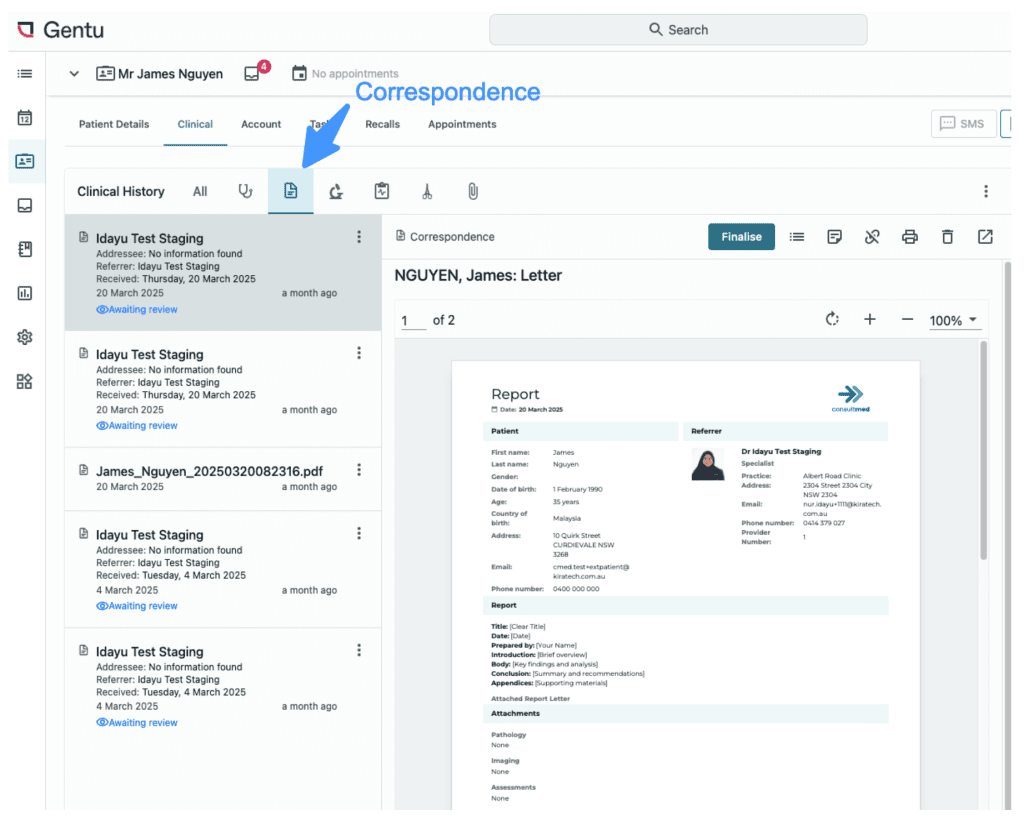
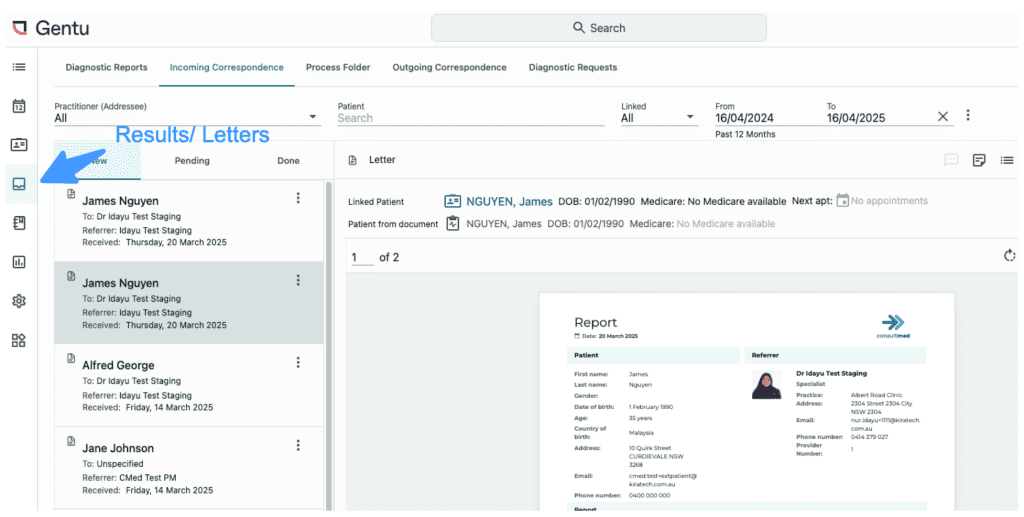
2.4 Correspondence In Folder
- All Consultmed acknowledgements, Advice & Guidance, reports and other correspondence relating to your referral will be received straight into your Results/Letters Folder in Gentu
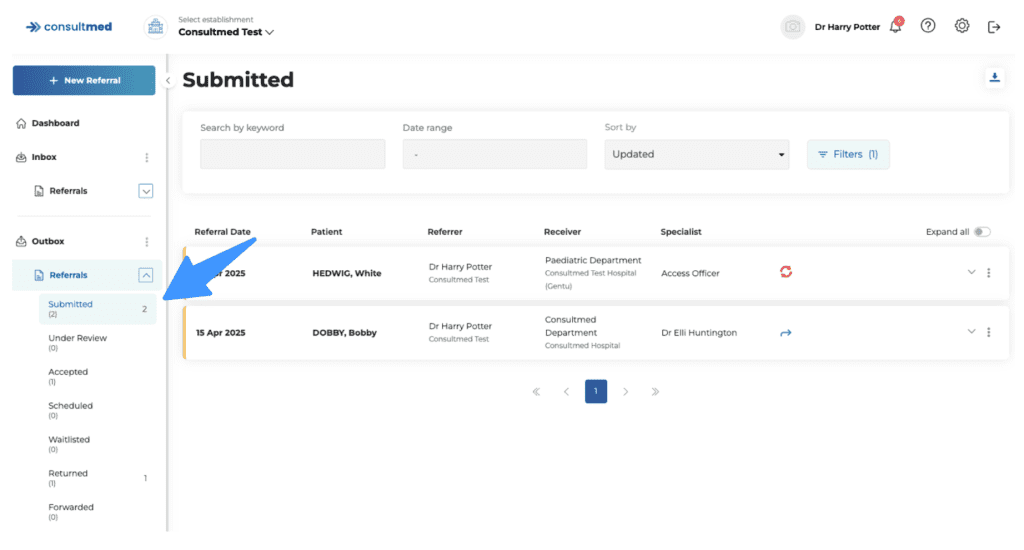
2.5 Consultmed
- Once a referral is sent, a copy is automatically stored in the Submitted folder within the Outbox in Consultmed.
Step Three – Receive Referrals
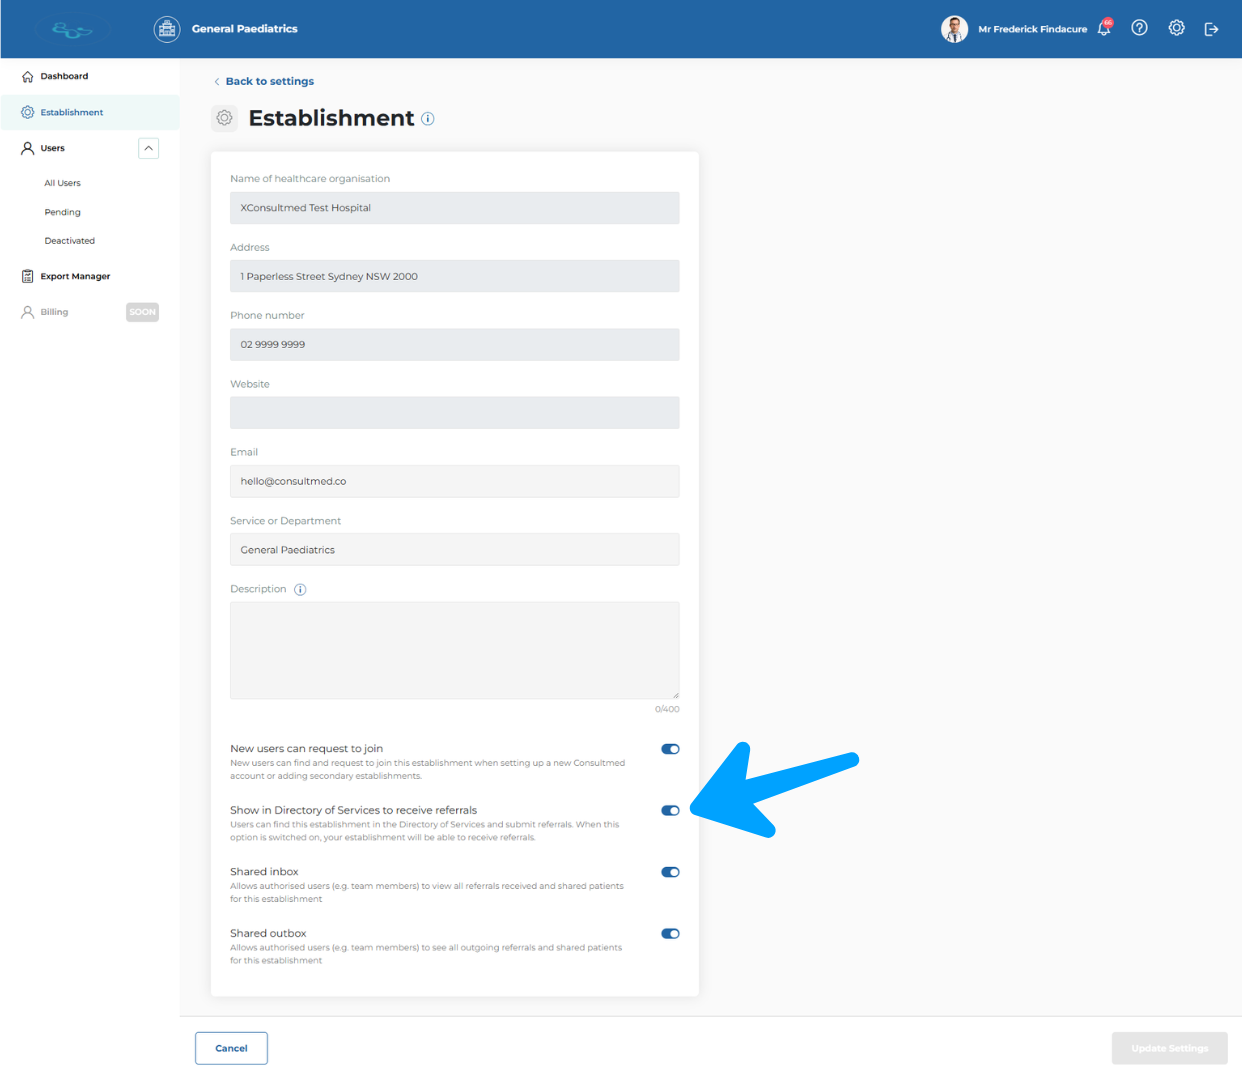
3.1 Set up your establishment to show in the Directory of Services to Receive Referrals
- In the Admin Portal, go to Establishment, then enable the toggle “Show in Directory of Services to receive referrals.”
3.2 Receiving a Referral
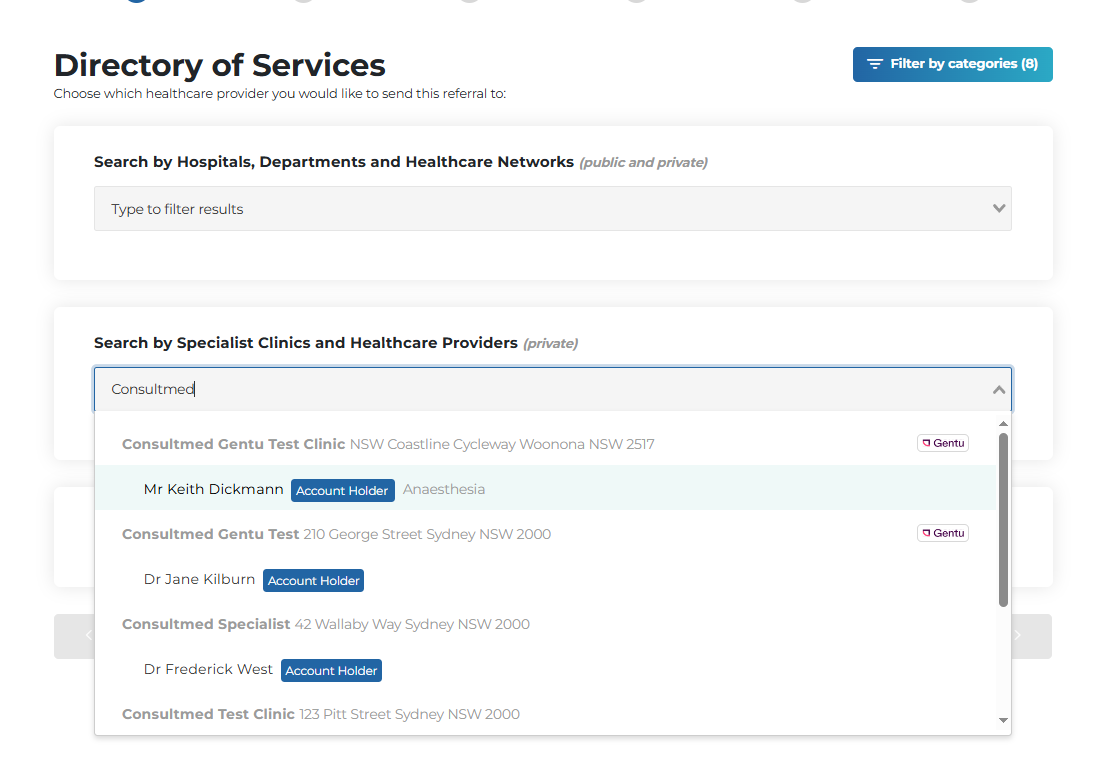
- Referrers (e.g. GPs) using Consultmed can refine their search and select a healthcare provider from the Directory of Services.
- Specialist Healthcare Providers with Gentu integration are prominently displayed in the Directory of Services. All integrated providers will have a Gentu logo shown alongside their establishment name for easy recognition.
3.3 Consultmed Inbox
- All New Referrals sent through Consultmed will appear in your New Folder in the Consultmed Inbox
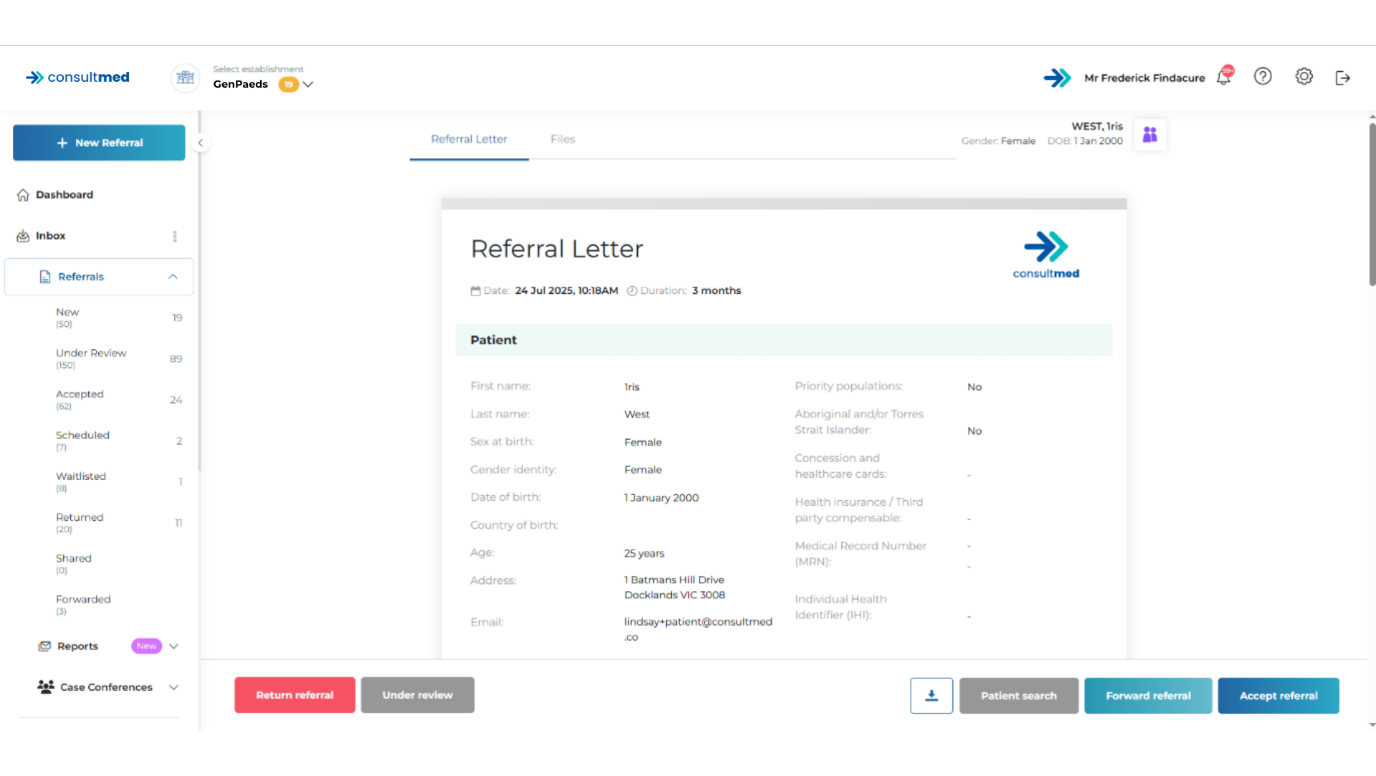
3.4 Results / Letters Folder
- Once received in Consultmed, the New Referral will automatically save into your Results / Letters Folder in Gentu
- If the patient already exists in Gentu the referral will be linked to that patient and automatically save against the patient.
- If the patient does not exist in Gentu, a new patient record will be automatically created and the referral will save against the new patient.
- Referrals will be automatically filed in the patient’s Results/Letters folder, ensuring a complete record is maintained against the patient profile.
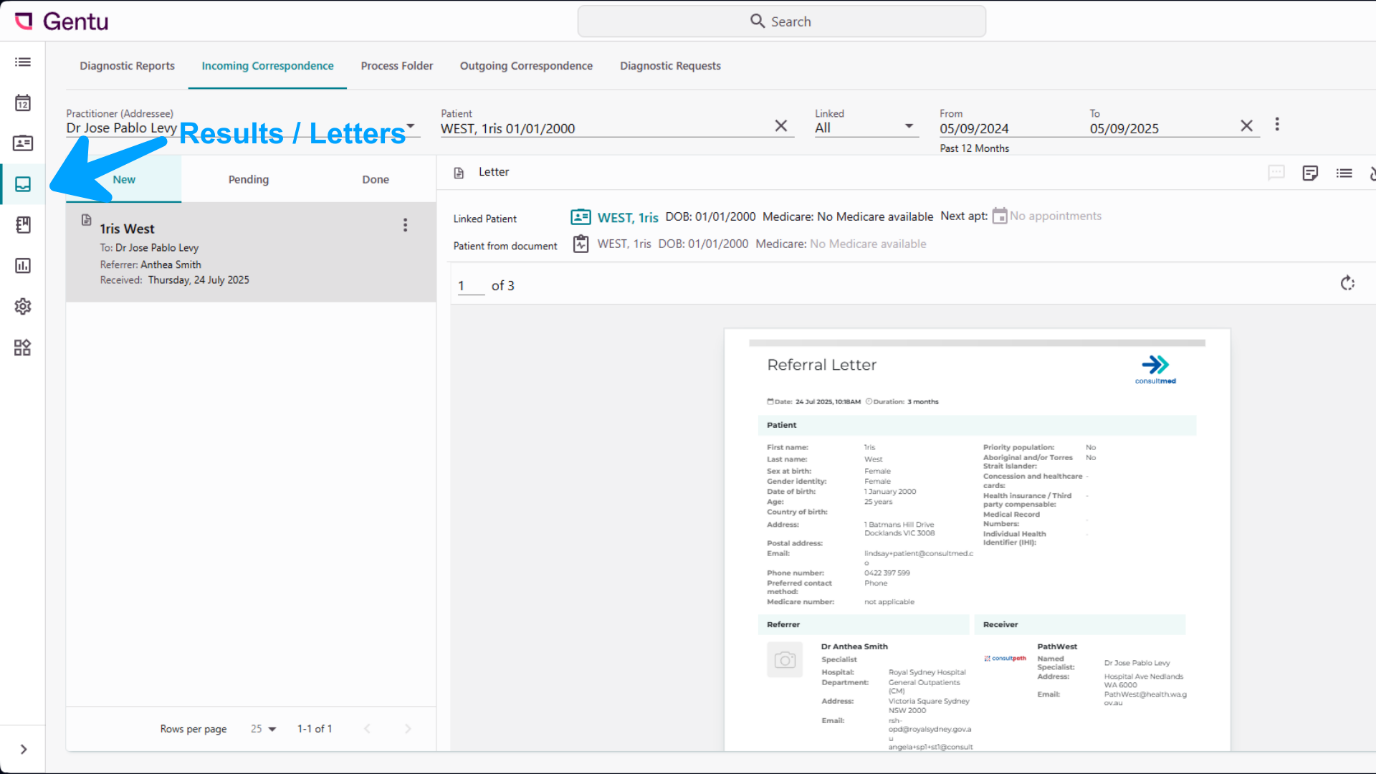
Tool tip: If you cannot find the referral, go to the Referrals / Letters folder, select Incoming Correspondence, and set the Practitioner to Unspecified.

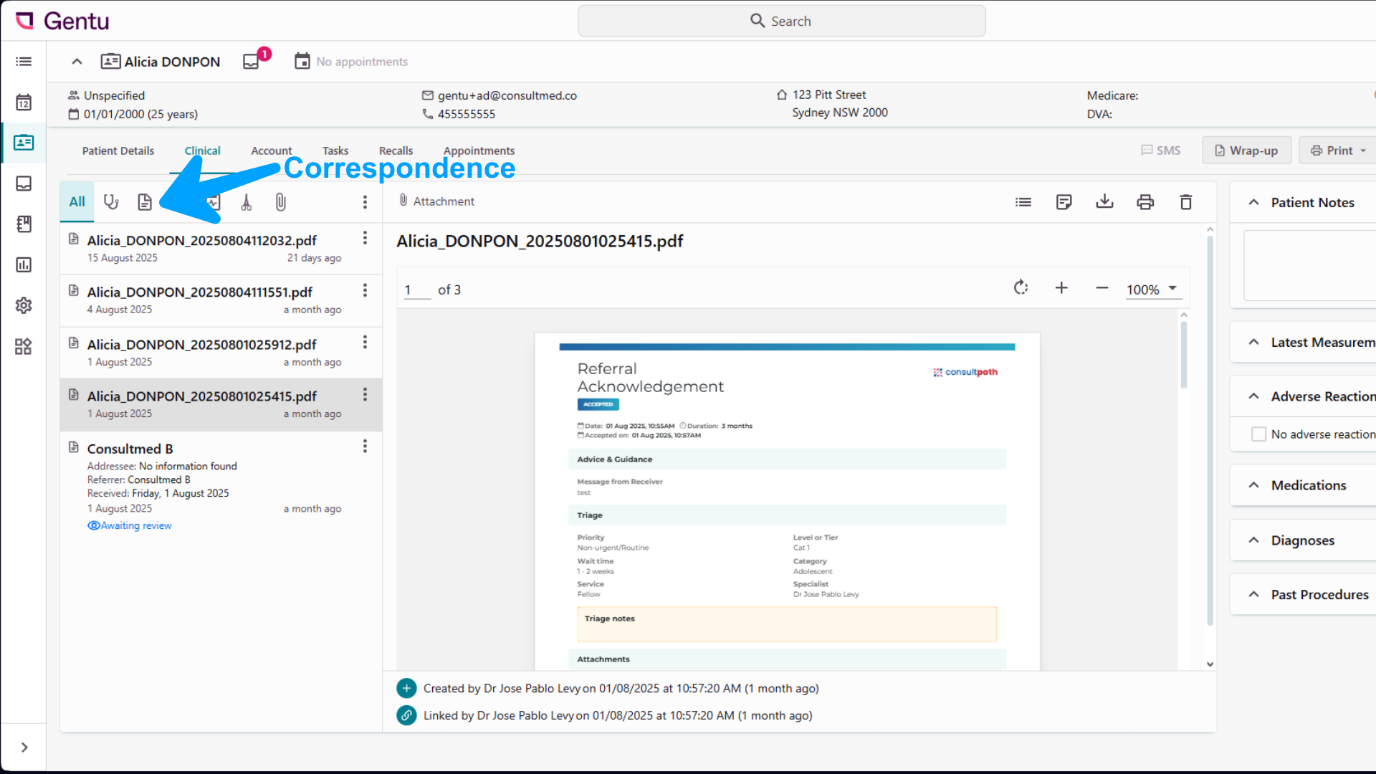
3.5 Correspondence Folder
- All Consultmed referrals acknowledgements, Advice & Guidance responses, reports, and any other correspondence linked to the referral will be delivered directly into the patient’s Correspondence folder in Gentu.
Click here to view on Vimeo
Contact Us
Gentu Support
- Gentu support: https://help.magentus.com/gentu/s/
- Phone Support 1300 889 362 (7:30am – 5:00pm AEST)
Consultmed Connect
- Contact: https://www.consultmed.co/contact/