Integrate Consultmed with Gentu
To integrate Gentu Practice Management Software (PMS) with Consultmed, simply link your Gentu account during the sign-up process or at any time after your Consultmed account has been set up.
1. Integrate with Gentu: As a New User
1.1 Create a Consultmed Account
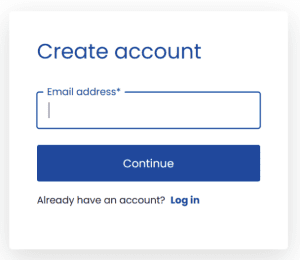
- Visit Consultmed (https://app.consultmed.co) to create a new account
- Enter your preferred email address (username) and password to create a new Consultmed account
Tool Tip: Each user is required to maintain a separate Consultmed account to uphold data privacy and security standards.
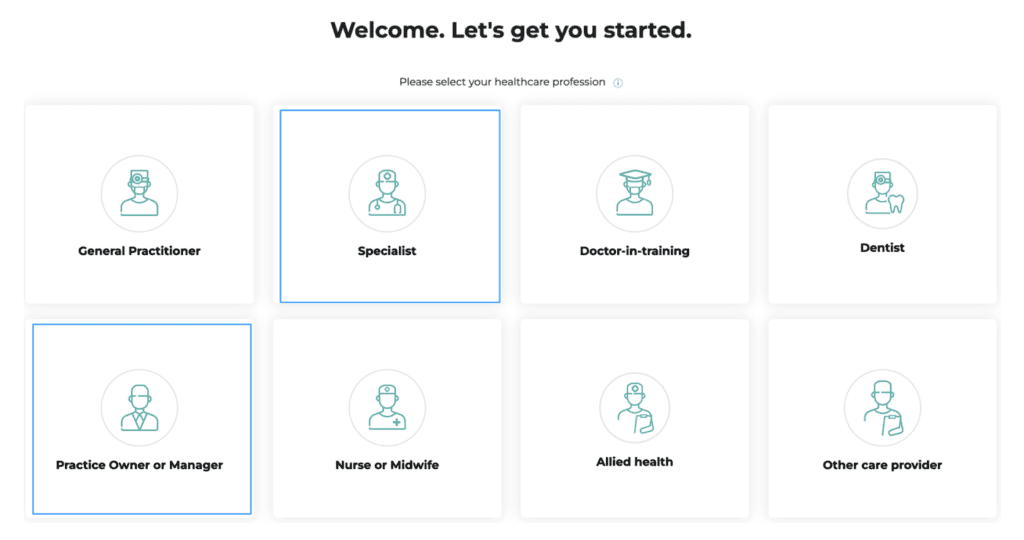
- Choose an account type (e.g. Specialist, Practice Manager) that matches your role within your health or care team
- Enter your professional details. Ensure your first and last name exactly match the details recorded in Gentu.
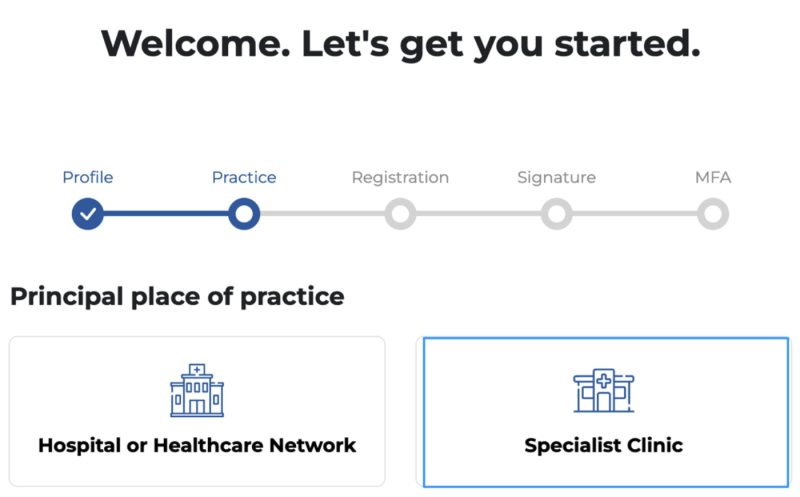
- Select your establishment type (e.g. Specialist Clinic).
- Search for your establishment by name or address, or add a new establishment by selecting +Add Practice
- Enter your registration details. You also have the option to add a signature or profile image to your account
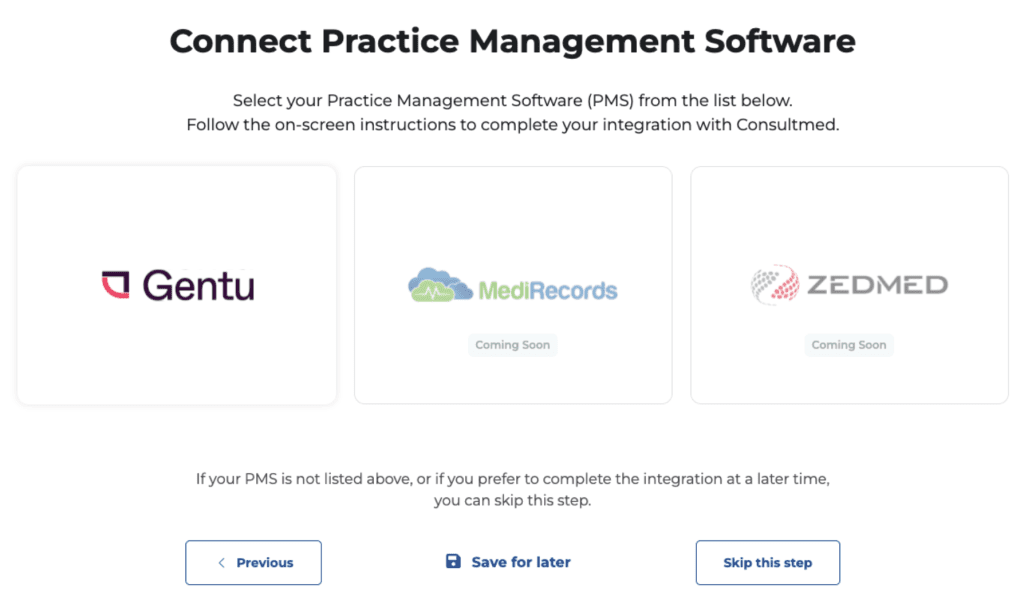
1.2 Connect Consultmed with Gentu
- Select Gentu
1.3 Add Consultmed to Gentu
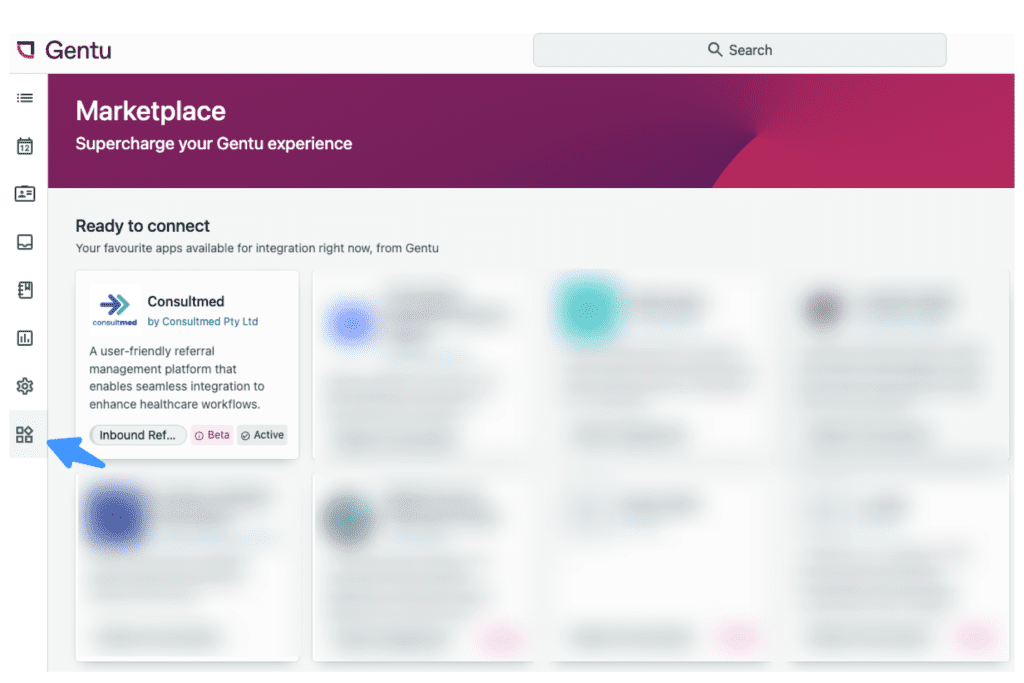
- Open your Gentu Practice Management Software (PMS)
- From the left-hand panel, select Gentu Marketplace.
- Click on the Consultmed Icon
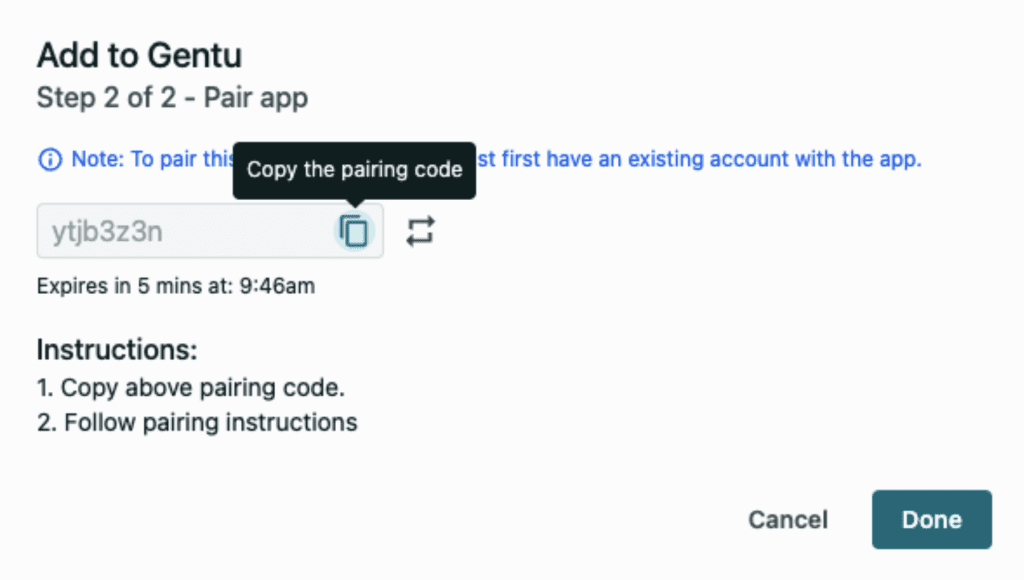
- In Step 1, review the Terms & Conditions, then click “I agree” followed by “Next”.
- Copy the Gentu Pairing Code displayed on the screen.
1.4 Pair Gentu with Consultmed
- Enter the Gentu Pairing Code
- Click Connect to complete the integration
1.5 Complete Registration
- Carefully review and agree to Consultmed’s Terms & Conditions
- Select Complete Registration to finalise your account set up
- Set up Multi-Factor Authentication (MFA) to ensure account privacy and security
Step One – Integrate Consultmed as an Existing User
Tool tip: The Consultmed x Gentu integration can only be configured by users with superuser access, such as Specialist users.
1.6 Log into your Consultmed Account
- Log into your Consultmed account using your nominated email address (username) and password
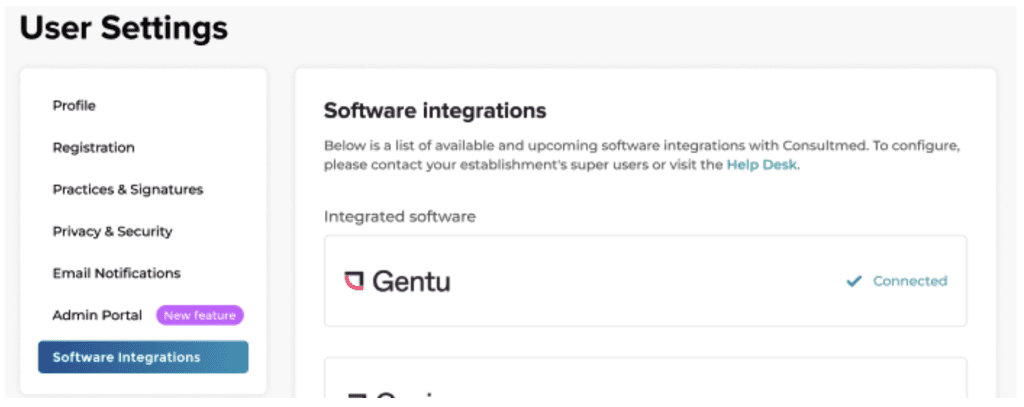
- Navigate to Settings (the cog wheel icon in the top right of the screen), and select Software Integrations
1.7 Connect Consultmed with Gentu
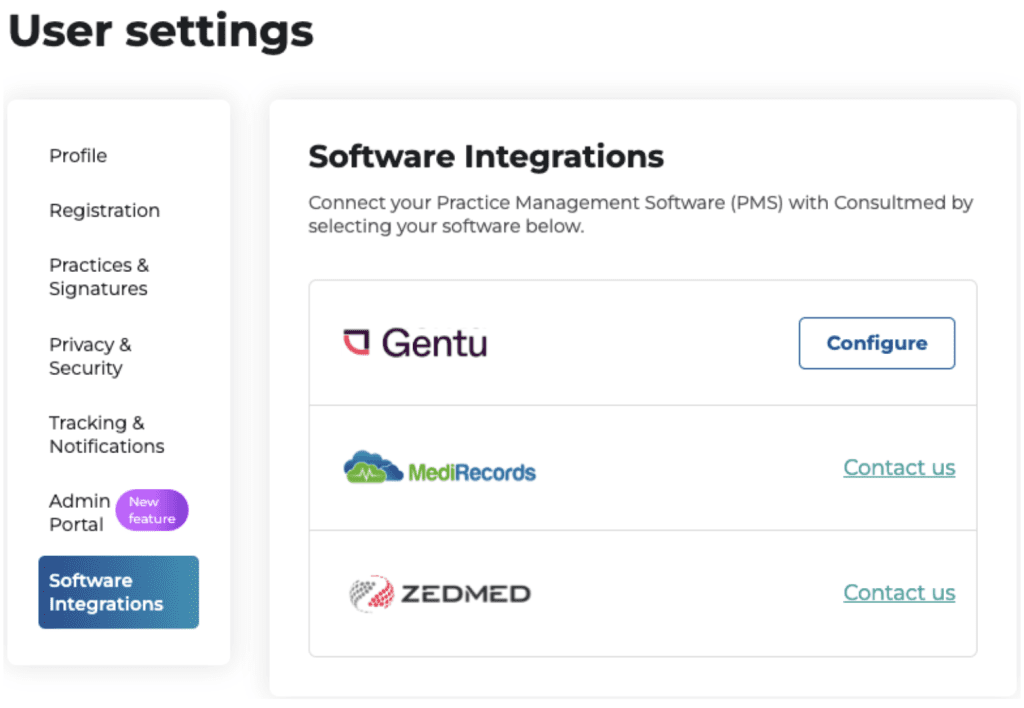
- Select Configure on the Gentu card
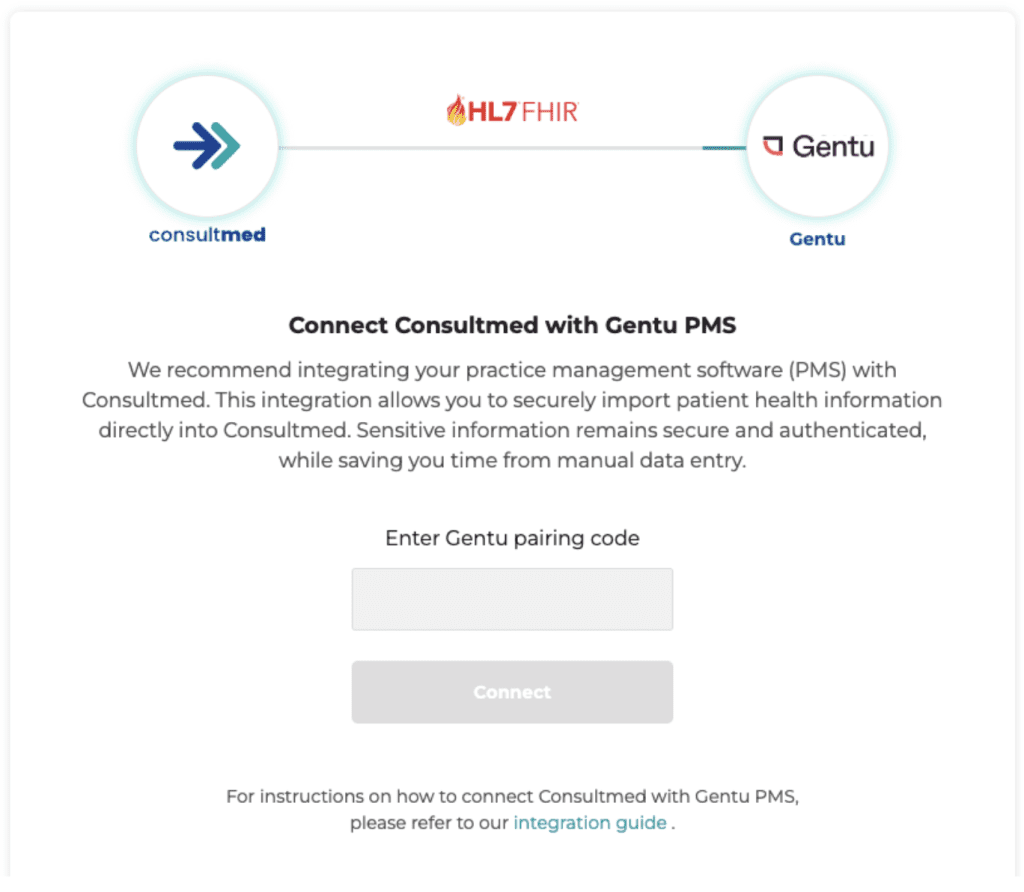
- You will be directed to Connect Consultmed with Gentu PMS page
- Select Configure on the Gentu card
- Enter the Gentu Pairing Code
- Click Connect to complete the integration
Successful integration
- Once complete, in User settings under Software Integrations, you will see your Gentu status showing Connected
Step Two – Create and Send Referrals
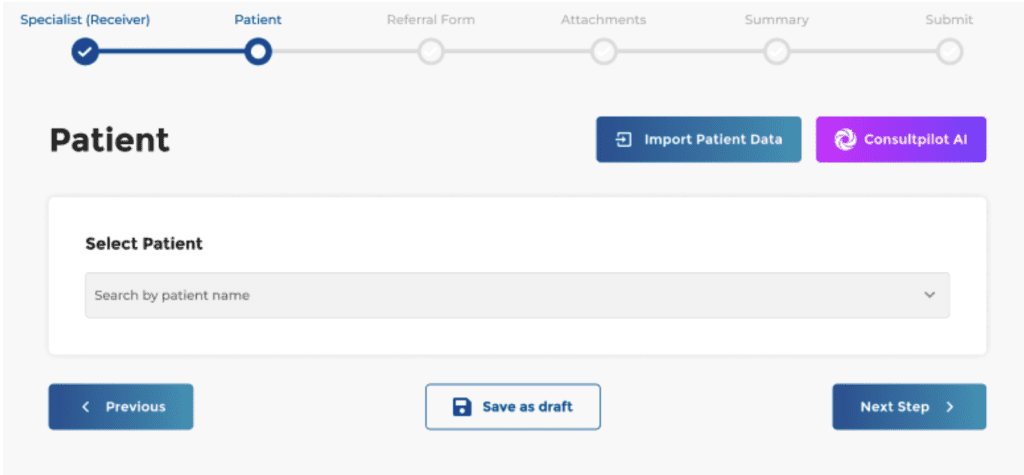
2.1 Create a new referral
- Log into Consultmed and Select +New Referral
- Filter by categories to refine your search and select a healthcare provider from the Directory of Services
2.2 Import Patient Data from Gentu
- Select Import Patient Data to initiate a search of patient details in your instance of Gentu
- There are two search options available
- Simple search
- Open the patient profile in your Gentu app
- Copy the URL from your web browser’s address bar
- Paste the URL into the field in Consultmed and click Search
- Simple search

- Advanced search
- Enter the Patient’s basic details (Last Name, First name, Date of Birth) and select Search
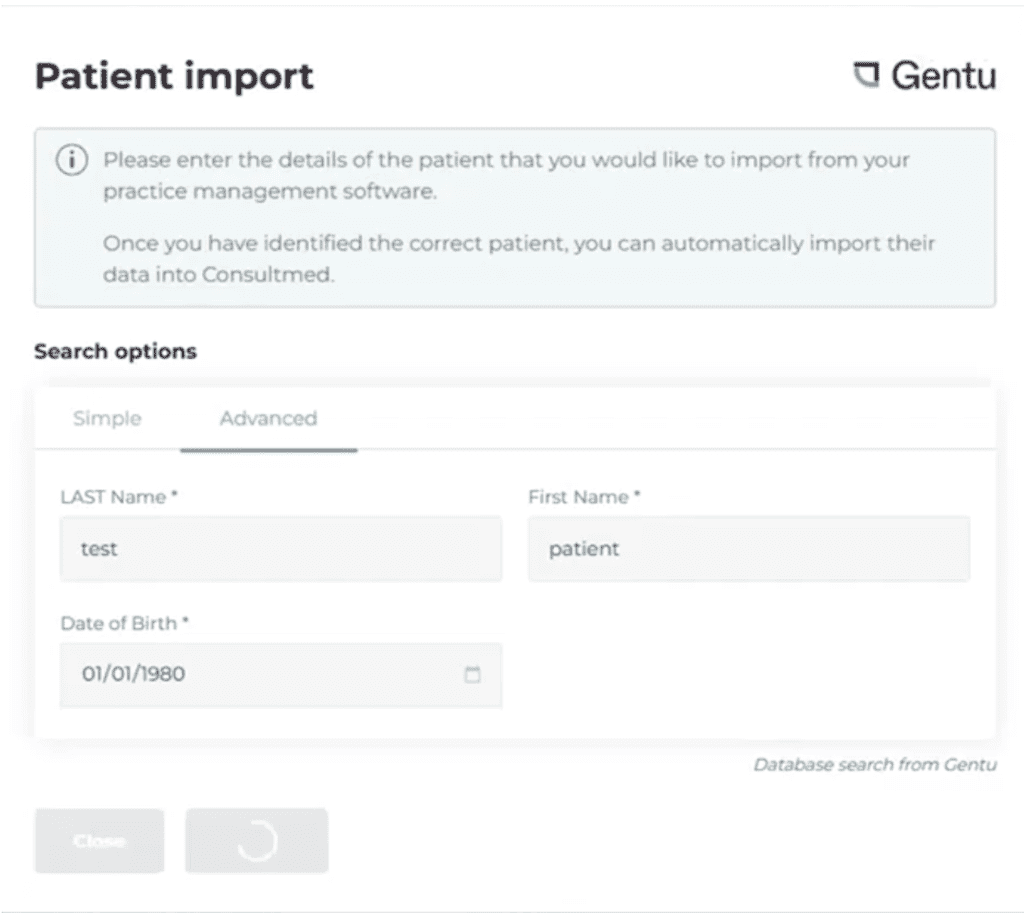
- Select the appropriate Patient match and click Import to automatically populate the referral form with the patient details stored in Gentu
- Remember to review and confirm the imported patient details
2.3 Correspondence Folder
- Once submitted in Consultmed, your referral will automatically be saved into the Correspondence Folder in Gentu
2.4 Correspondence In Folder
- All Consultmed acknowledgements, Clinical Advice & Guidance™, reports and other correspondence relating to your referral will be received straight into your Results/Letters Folder in Gentu
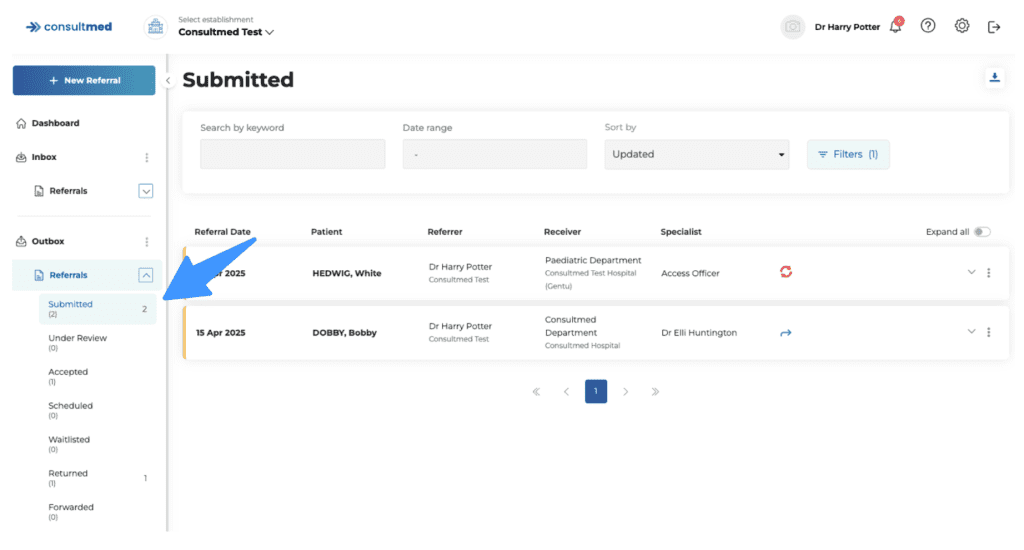
2.5 Consultmed
- Once a referral is sent, a copy is automatically stored in the Submitted folder within the Outbox in Consultmed.
Step Three – Receive Referrals
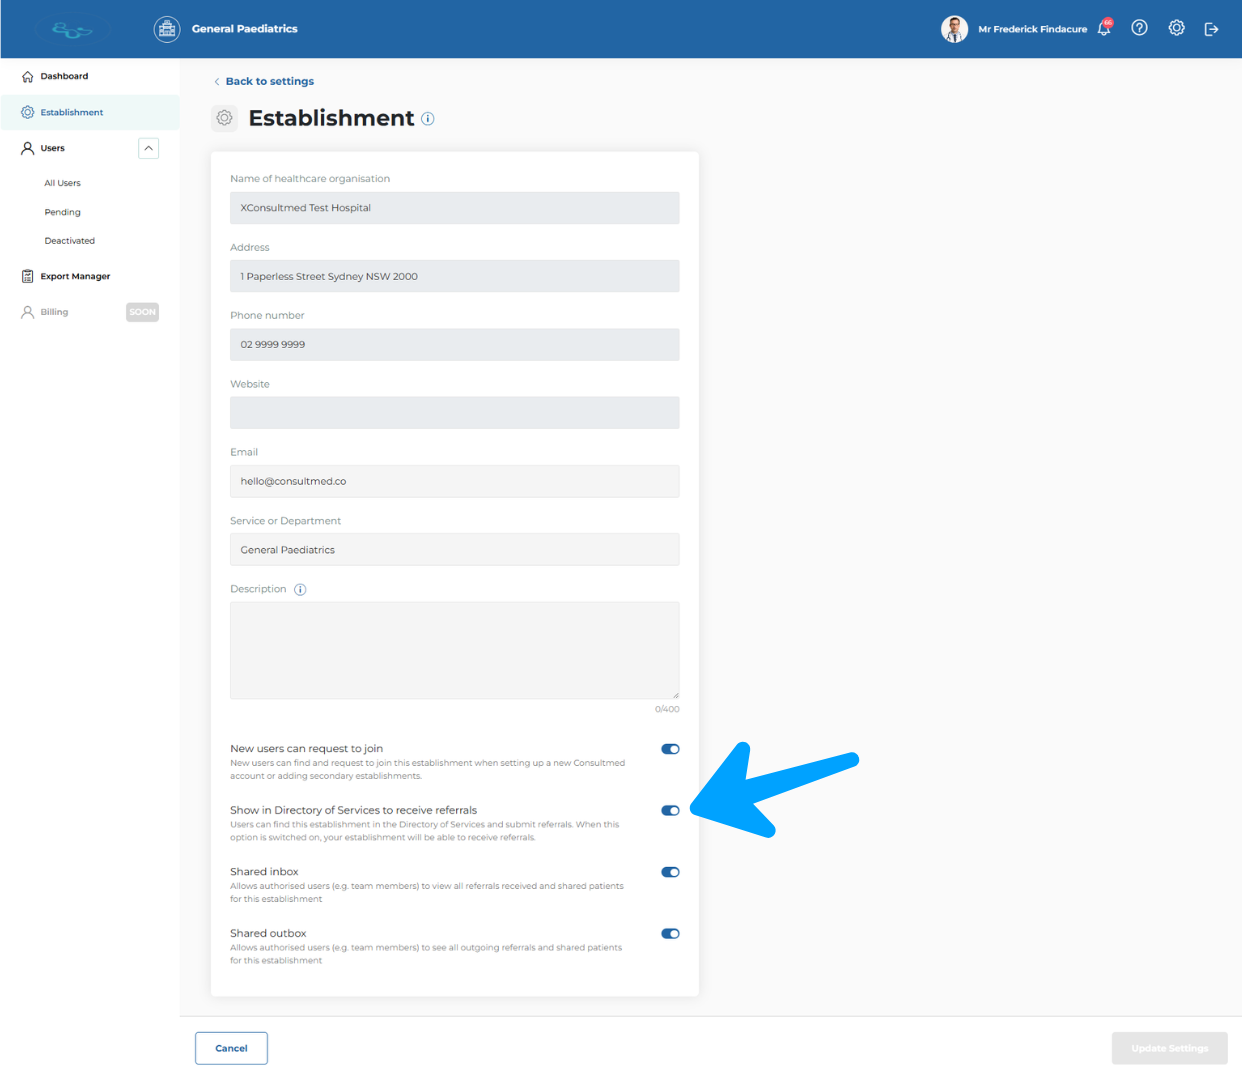
3.1 Set up your establishment to show in the Directory of Services to Receive Referrals
- In the Admin Portal, go to Establishment, then enable the toggle “Show in Directory of Services to receive referrals.”
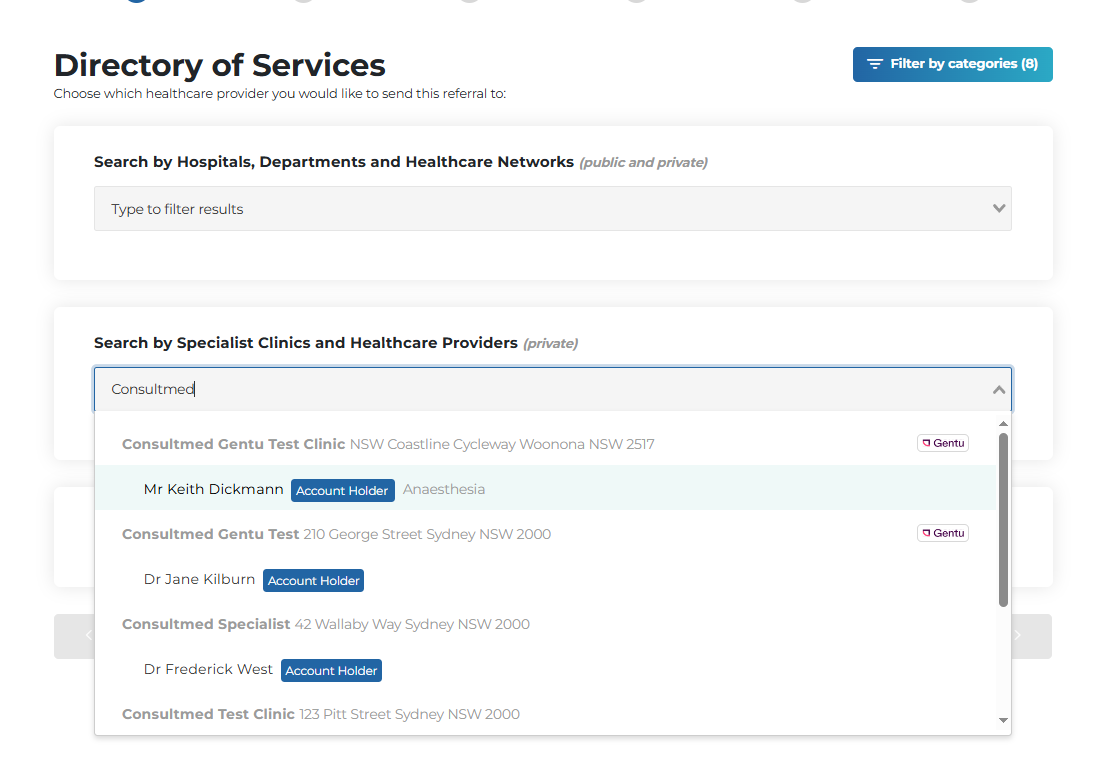
3.2 Receiving a Referral
- Referrers (e.g. GPs) using Consultmed can refine their search and select a healthcare provider from the Directory of Services.
- Specialist Healthcare Providers with Gentu integration are prominently displayed in the Directory of Services. All integrated providers will have a Gentu logo shown alongside their establishment name for easy recognition.
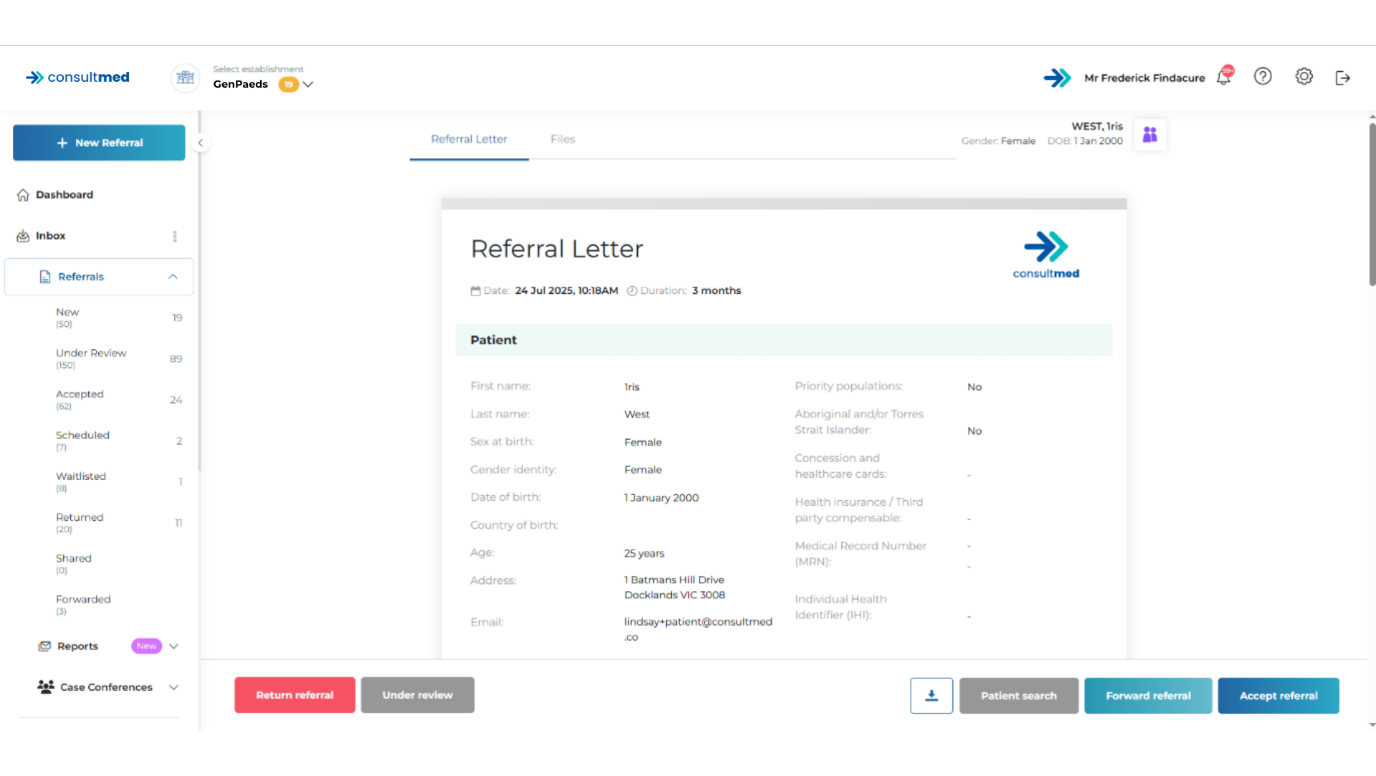
3.3 Consultmed Inbox
- All New Referrals sent through Consultmed will appear in your New Folder in the Consultmed Inbox
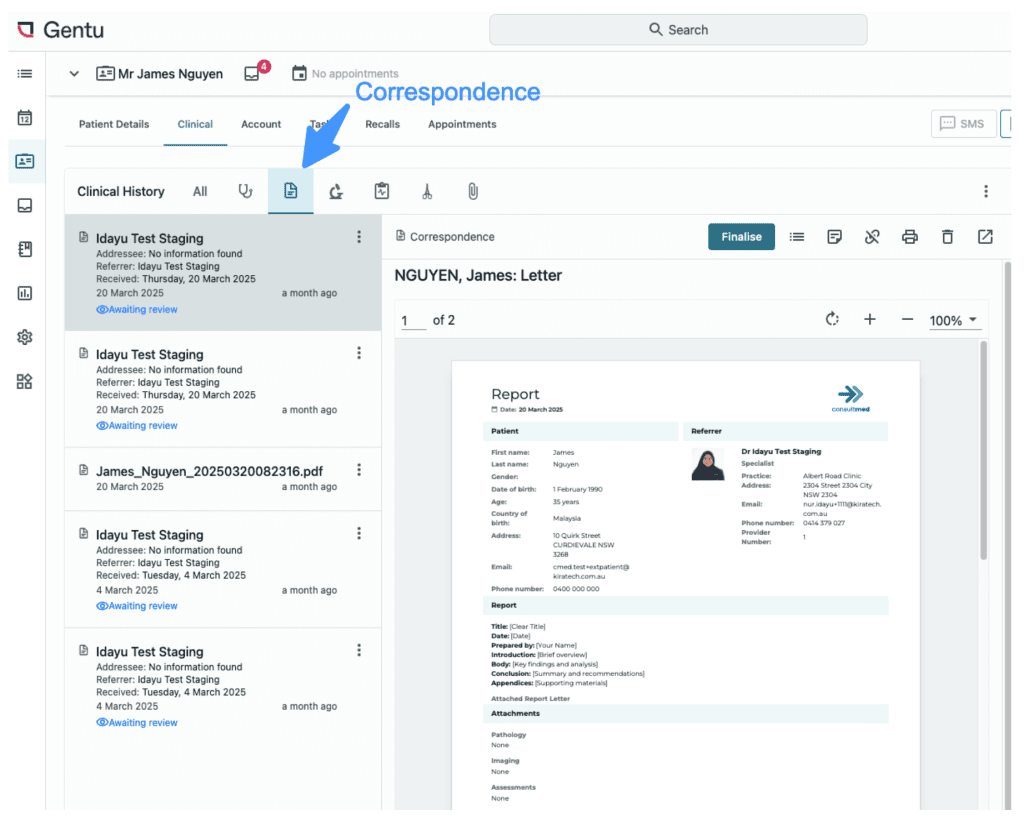
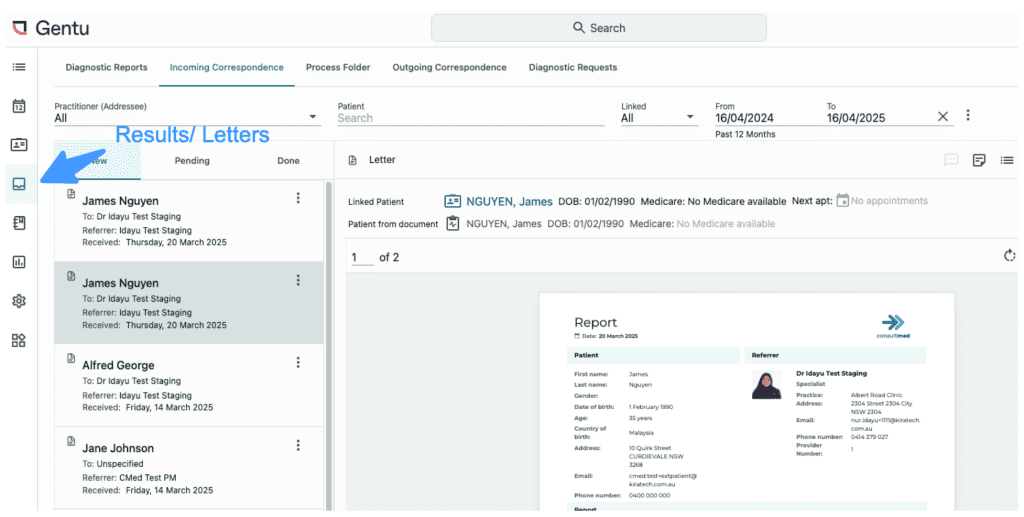
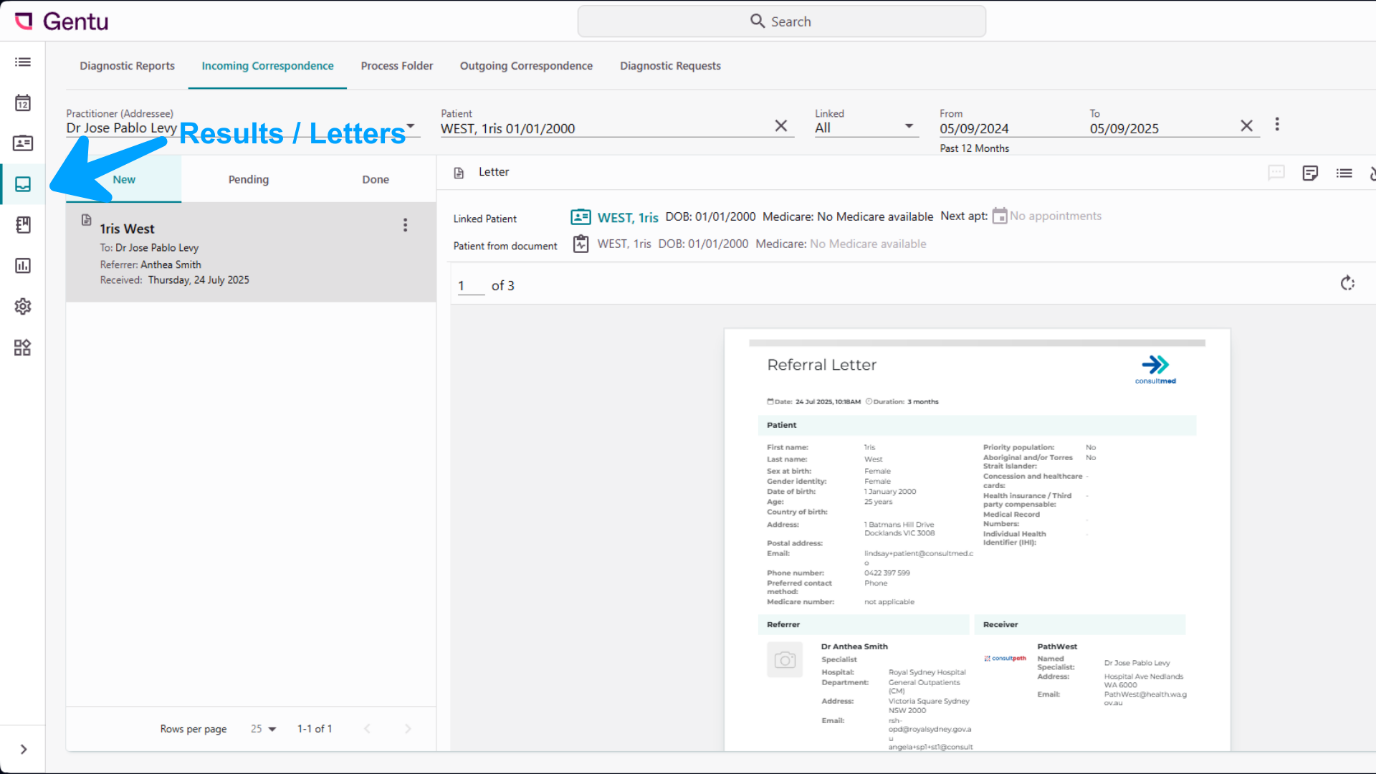
3.4 Results / Letters Folder
- Once received in Consultmed, the New Referral will automatically save into your Results / Letters Folder in Gentu
- If the patient already exists in Gentu the referral will be linked to that patient and automatically save against the patient.
- If the patient does not exist in Gentu, a new patient record will be automatically created and the referral will save against the new patient.
- Referrals will be automatically filed in the patient’s Results/Letters folder, ensuring a complete record is maintained against the patient profile.
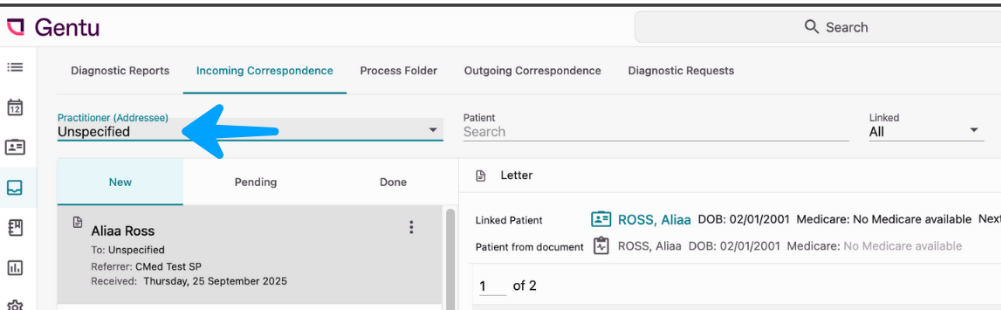
Tool tip: If you cannot find the referral, go to the Referrals / Letters folder, select Incoming Correspondence, and set the Practitioner to Unspecified.
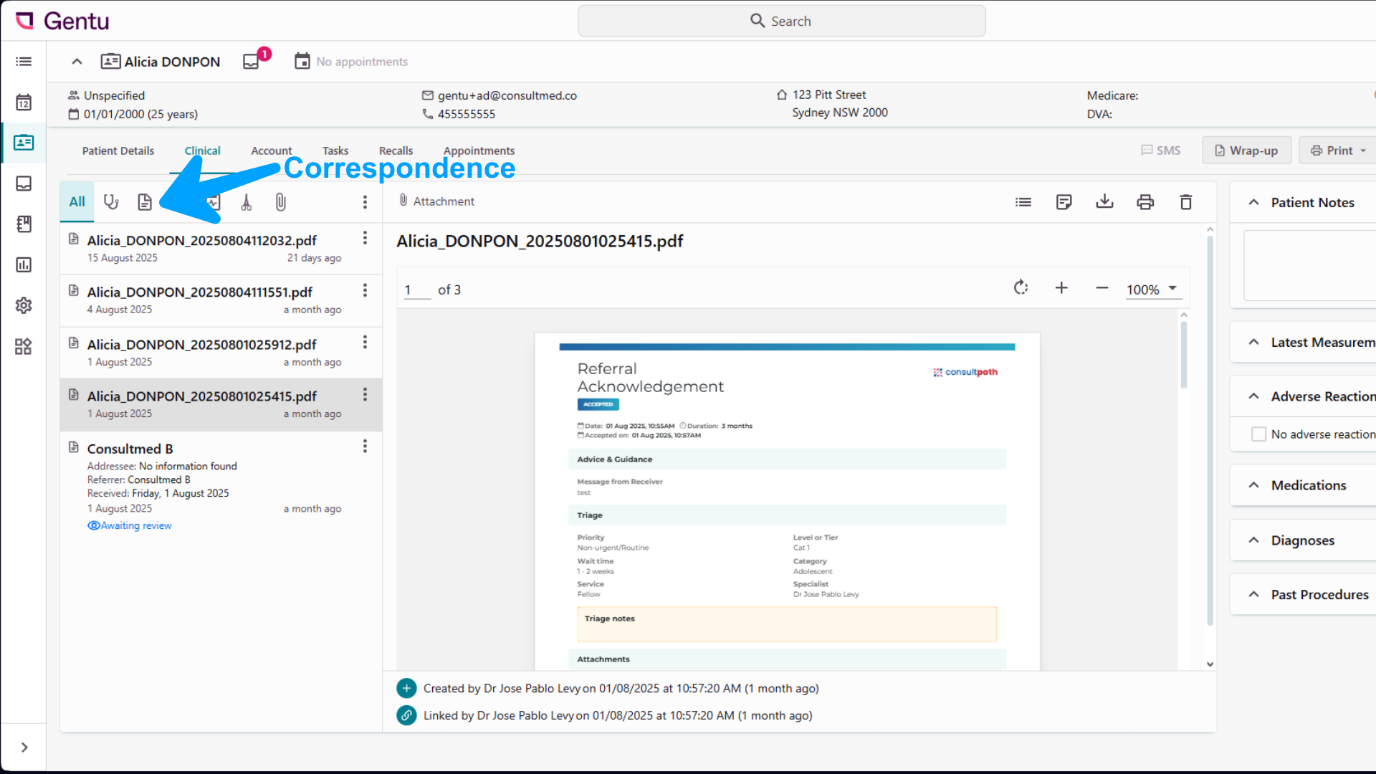
3.5 Correspondence Folder
- All Consultmed referrals acknowledgements, Clinical Advice & Guidance™ responses, reports, and any other correspondence linked to the referral will be delivered directly into the patient’s Correspondence folder in Gentu.
Click here to view on Vimeo
Contact Us
Gentu Support
- Gentu support: https://help.magentus.com/gentu/s/
- Phone Support 1300 889 362 (7:30am – 5:00pm AEST)
Consultmed Connect
- Contact: https://www.consultmed.co/contact/